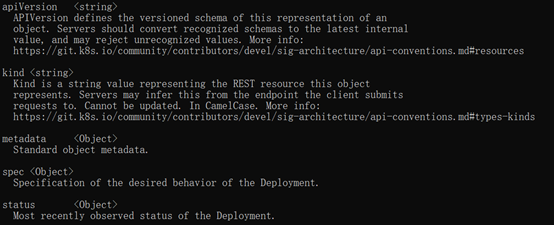
我们说下工作负载中的第一个上层对象-Deployment
其为Pods提供了声明式的更新能力
K8S内部由Controller-Manager管理了一个Deployment-Controller,其负责将Deployment进行解析,并修改status 状态=spec状态。
Deployment 也不是直接去管理Pod,而是管理一个新的中间对象,ReplicaSet,关于ReplicaSet,我们会在下面讲
然后我们先看下Deployment的书写模板
仍然是包含五个大模块

那么重点在于spec的书写,其内部的字段如下
| minReadySeconds <integer>
Minimum number of seconds for which a newly created pod should be ready without any of its container crashing, for it to be considered available. Defaults to 0 (pod will be considered available as soon as it is ready) paused <boolean> Indicates that the deployment is paused. progressDeadlineSeconds <integer> The maximum time in seconds for a deployment to make progress before it is considered to be failed. The deployment controller will continue to process failed deployments and a condition with a ProgressDeadlineExceeded reason will be surfaced in the deployment status. Note that progress will not be estimated during the time a deployment is paused. Defaults to 600s. replicas <integer> Number of desired pods. This is a pointer to distinguish between explicit zero and not specified. Defaults to 1. revisionHistoryLimit <integer> The number of old ReplicaSets to retain to allow rollback. This is a pointer to distinguish between explicit zero and not specified. Defaults to 10. selector <Object> -required- Label selector for pods. Existing ReplicaSets whose pods are selected by this will be the ones affected by this deployment. It must match the pod template’s labels. strategy <Object> The deployment strategy to use to replace existing pods with new ones. template <Object> -required- Template describes the pods that will be created. |
比较重点的字段有:
replicas 指定了副本数量
selector 指定匹配的Pod模板
template 声明一个Pod模板
上面的selector表示要管理哪些Pod,其管理的原理在于,要求被管理的Pod中携带selector中声明的Label
而在Deployment管理的下层,是一个ReplicaSet,对于ReplicaSet,我们也看下其中包含的字段
| minReadySeconds <integer>
Minimum number of seconds for which a newly created pod should be ready without any of its container crashing, for it to be considered available. Defaults to 0 (pod will be considered available as soon as it is ready) replicas <integer> Replicas is the number of desired replicas. This is a pointer to distinguish between explicit zero and unspecified. Defaults to 1. More info: selector <Object> -required- Selector is a label query over pods that should match the replica count. Label keys and values that must match in order to be controlled by this replica set. It must match the pod template’s labels. More info: https://kubernetes.io/docs/concepts/overview/working-with-objects/labels/#label-selectors template <Object> Template is the object that describes the pod that will be created if insufficient replicas are detected. More info: https://kubernetes.io/docs/concepts/workloads/controllers/replicationcontroller#pod-template |
其中基本和Deployment一致,最重要的是replicas,表示管理多少的Pod.
整体来说结构就是
因此,Deployment 对 Pod具有了自愈能力
如果对管理的Pod进行了删除操作,也会进行相关的再启动
其次是Deployment中,也具有一个新的能力,就是滚动更新的能力
关于Deployment的滚动更新的能力,利用的是ReplicaSet,每次当Deployment发生变化的时候,会生成一个新的rs,利用这种方式保存了内部的Pod相关的定义,从而方便回滚
对于保存的RS个数,则是由Deployment 中 spec中revisionHsitoryLimit设置的
无论我们是修改Deployment的yaml文件,还是直接利用kubectl set images命令
都是会产生一个新的RS
如果需要直接的回滚,也可以使用rs,命令为
kubectl rollout history deployment && kubectl rollout undo deployment
不过需要注意,rollout history中,并不会记录修改了什么,需要我们在应用命令的时候利用—record来进行记录
如果不想要每次应用都产生一个RS,则可以使用
kubectl rollout pause 暂停产生RS
然后多次修改完成后
kubectl rollout resume
恢复并应用更新,同理的deployment中的spec配置项有一个paused
配置了之后,部署的Depolyment不会产生新的RS
剩下的配置项诸如
minReadySeconds 最小的准备时间,就是一个Pod启动之后,多少秒后才会判断他已经可以提供服务了,这一点适用于Pod更新
progressDeadlineSeconds 最迟就绪时间
strategy:控制滚动更新的色织
里面包含的字段有
rollingUpdate type
首先看type这个字段
其中可以配置的方式有 Recreate和RollingUpdate
如果是”Recreate”的话,其实就是每创建一个新的,就删去一个老的,相当于顶替
而RollingUpdate就是和上面的rollingUpdate进行联动,做到滚动更新的
rollingUpdate中可以配置的有 maxSurge maxUnavailable
一个是每次最大能够更新多少个Pod,一个是表示最多有多少不可用
maxSurge相对好理解,而maxUnavailable则是在更新过程中,新的Pod的和旧的Pod加一次等于replica 减去 maxUnavailable
两者的配置可以是 数字,也可以是百分比
说完了这个,我们看下Deployment中的HPA,也就是动态的扩缩容
对应的文档是
https://kubernetes.io/zh/docs/tasks/run-application/horizontal-pod-autoscale/#scaling-policies
而对HPA的开启,需要部署对应的Deployment
需要先安装一个metrics-server
安装的方式,在github上存在
https://github.com/kubernetes-sigs/metrics-server
对应的部署yaml如下
| apiVersion: v1
kind: ServiceAccount metadata: labels: k8s-app: metrics-server name: metrics-server namespace: kube-system — apiVersion: rbac.authorization.k8s.io/v1 kind: ClusterRole metadata: labels: k8s-app: metrics-server rbac.authorization.k8s.io/aggregate-to-admin: “true” rbac.authorization.k8s.io/aggregate-to-edit: “true” rbac.authorization.k8s.io/aggregate-to-view: “true” name: system:aggregated-metrics-reader rules: – apiGroups: – metrics.k8s.io resources: – pods – nodes verbs: – get – list – watch — apiVersion: rbac.authorization.k8s.io/v1 kind: ClusterRole metadata: labels: k8s-app: metrics-server name: system:metrics-server rules: – apiGroups: – “” resources: – pods – nodes – nodes/stats – namespaces – configmaps verbs: – get – list – watch — apiVersion: rbac.authorization.k8s.io/v1 kind: RoleBinding metadata: labels: k8s-app: metrics-server name: metrics-server-auth-reader namespace: kube-system roleRef: apiGroup: rbac.authorization.k8s.io kind: Role name: extension-apiserver-authentication-reader subjects: – kind: ServiceAccount name: metrics-server namespace: kube-system — apiVersion: rbac.authorization.k8s.io/v1 kind: ClusterRoleBinding metadata: labels: k8s-app: metrics-server name: metrics-server:system:auth-delegator roleRef: apiGroup: rbac.authorization.k8s.io kind: ClusterRole name: system:auth-delegator subjects: – kind: ServiceAccount name: metrics-server namespace: kube-system — apiVersion: rbac.authorization.k8s.io/v1 kind: ClusterRoleBinding metadata: labels: k8s-app: metrics-server name: system:metrics-server roleRef: apiGroup: rbac.authorization.k8s.io kind: ClusterRole name: system:metrics-server subjects: – kind: ServiceAccount name: metrics-server namespace: kube-system — apiVersion: v1 kind: Service metadata: labels: k8s-app: metrics-server name: metrics-server namespace: kube-system spec: ports: – name: https port: 443 protocol: TCP targetPort: https selector: k8s-app: metrics-server — apiVersion: apps/v1 kind: Deployment metadata: labels: k8s-app: metrics-server name: metrics-server namespace: kube-system spec: selector: matchLabels: k8s-app: metrics-server strategy: rollingUpdate: maxUnavailable: 0 template: metadata: labels: k8s-app: metrics-server spec: containers: – args: – –cert-dir=/tmp – –kubelet-insecure-tls – –secure-port=4443 – –kubelet-preferred-address-types=InternalIP,ExternalIP,Hostname – –kubelet-use-node-status-port image: xxxxx/metrics-server:v0.4.3 #需要修改为可以访问到的image仓库 imagePullPolicy: IfNotPresent livenessProbe: failureThreshold: 3 httpGet: path: /livez port: https scheme: HTTPS periodSeconds: 10 name: metrics-server ports: – containerPort: 4443 name: https protocol: TCP readinessProbe: failureThreshold: 3 httpGet: path: /readyz port: https scheme: HTTPS periodSeconds: 10 securityContext: readOnlyRootFilesystem: true runAsNonRoot: true runAsUser: 1000 volumeMounts: – mountPath: /tmp name: tmp-dir nodeSelector: kubernetes.io/os: linux priorityClassName: system-cluster-critical serviceAccountName: metrics-server volumes: – emptyDir: {} name: tmp-dir — apiVersion: apiregistration.k8s.io/v1 kind: APIService metadata: labels: k8s-app: metrics-server name: v1beta1.metrics.k8s.io spec: group: metrics.k8s.io groupPriorityMinimum: 100 insecureSkipTLSVerify: true service: name: metrics-server namespace: kube-system version: v1beta1 versionPriority: 100 |
kubectl apply之后
可以利用如下的命令来查看硬件使用率
kubectl top nodes –user-protocol-buffers
之后在配置并部署了Deployment之后,我们可以书写对应的hpa的yaml文件来进行
一个实例如下
| apiVersion: autoscaling/v1
kind: HorizontalPodAutoscaler metadata: name: php-apache #元数据 spec: maxReplicas: 10 #最大的Replicas minReplicas: 1 #最小的Replicas scaleTargetRef: #要扫描的对象 apiVersion: apps/v1 kind: Deployment name: php-apache targetCPUUtilizationPercentage: 50 #触发的临界条件 |
之后kubectl apply -f 一下即可